Understanding MIDI: A Guide to Digital Music Creation
Explore the fundamentals of MIDI technology—from its history and message structure to practical applications in composition, performance and sound design—empowering musicians to harness digital tools for versatile, efficient and expressive music creation in today’s studios.

The Musical Instrument Digital Interface, commonly known as MIDI, stands as one of the most transformative technologies in music history. Since its inception in the early 1980s, MIDI has evolved from a curious experimental protocol into a cornerstone of modern music production, performance, education and sound design. In this guide, we shall explore what MIDI is, how it functions, the myriad of applications it enables, and practical advice for using it effectively. Whether you are a budding composer, a seasoned producer or simply curious about how digital music comes together, this article offers a comprehensive overview to bolster your understanding and mastery of MIDI.
What Is MIDI?
A Brief History
MIDI emerged in 1982 as a collaborative effort among leading electronic instrument manufacturers of the time—Roland, Yamaha, Korg, Sequential Circuits and others—who recognised a pressing need for standardisation. Prior to MIDI, synthesiser brands used proprietary protocols, meaning that connecting gear from different manufacturers was often complex or impossible. Musicians and technicians yearned for a universal language that would allow disparate devices to communicate seamlessly.
By 1983, the first MIDI specification was released, paving the way for synthesiser keyboards, drum machines and sequencers to “talk” to each other. The initial standard described how to send numerical instructions—such as “play middle C at velocity 100” or “change to Patch 15 on Channel 2”—rather than audio signals themselves. Over the decades, MIDI has undergone incremental refinements (most notably the introduction of General MIDI in 1991, which standardised instrument patch mappings), but its core tenets remain intact.
Defining MIDI
At its simplest, MIDI is a digital communication protocol. It does not transmit audio; rather, it conveys performance data—note on/off messages, control changes, pitch-bend, program changes and more—between devices or software. When you press a key on a MIDI keyboard, the keyboard generates a “Note On” message (complete with which note, how hard and on which channel) and sends it to another device (a synthesiser module, a computer running a Digital Audio Workstation (DAW), etc.), which then “translates” it into an audible sound based on its internal settings.
Put succinctly:
- MIDI = Data, Not Audio. MIDI messages describe musical performance parameters. Those messages trigger synthesis or sampling engines to generate actual sound.
- Universal Language. From hardware synthesizers to software instruments, from lighting consoles to drum machines, any device that supports MIDI can interpret and respond to those messages.
- Extensible. Over the years, MIDI has grown to include more advanced features (System Exclusive messages, MIDI Polyphonic Expression, MIDI Time Code), rendering it capable of controlling not only musical parameters but also broader multimedia elements.
How MIDI Works
The Structure of a MIDI Message
Every MIDI “instruction” comprises a series of bytes—eight‐bit sequences transmitted at a fixed baud rate (31,250 bits per second). A typical message has the following components:
- Status Byte (Most Significant Bit = 1). Indicates the type of message (e.g., Note On, Note Off, Control Change, Program Change) and the MIDI channel (1–16) to which it pertains.
- Data Bytes (Most Significant Bit = 0). Contain additional information, such as note number (0–127, where 60 = Middle C), velocity (how hard a key is pressed, 0–127), controller number (e.g., 7 for volume, 10 for pan), and controller value (0–127).
For example, a “Note On, Middle C, velocity 100 on Channel 1” message is encoded as three bytes:
- Status: 1001 0000 (binary) = 0x90 (hex) (Note On on Channel 1)
- Data 1: 0011 1100 (binary) = 0x3C (hex) (Note number 60)
- Data 2: 0110 0100 (binary) = 0x64 (hex) (Velocity 100)
When the key is released, a corresponding “Note Off” message (0x80, note number, release velocity) is sent.
MIDI Channels and Polyphony
MIDI supports up to 16 channels per port. Each channel can transmit independent streams of data—allowing, for instance, one keyboard to play piano on Channel 1, strings on Channel 2, and bass on Channel 3 (either via a multitimbral hardware module or separate devices daisy-chained).
Within each channel, multiple notes can sound simultaneously. For instance, to play a four-note chord, four distinct “Note On” messages (for each note number) are dispatched, and the synthesiser’s voice architecture determines polyphony limits. High-end hardware and modern software instruments typically support dozens or even hundreds of simultaneous voices.
Controllers, Program Changes and System Messages
Beyond notes, MIDI transmits performance nuances and device instructions via:
- Control Change (CC) Messages. Each controller number (0–127) corresponds to a specific parameter. Common CCs include:When you move a modulation wheel or press a sustain pedal, the keyboard/cradle sends a CC message to inform the receiving device of the change.
- CC 1: Modulation Wheel
- CC 7: Channel Volume
- CC 10: Pan Position
- CC 64: Sustain Pedal (0–63 off, 64–127 on)
- CC 74: Filter Cutoff (in synthesiser contexts)
- Program Change Messages. A single byte that instructs a multitimbral module or software instrument to switch presets or patches (e.g., from Acoustic Grand Piano to Electric Piano). Program Change values range from 0 to 127, typically corresponding to internally defined instrument banks.
- Pitch Bend Messages. Two data bytes (14-bit resolution) that specify a fine adjustment to pitch, often used to emulate guitar bends or synthesiser portamento. Centre (no bend) is 0x2000; full‐up/down correspond to extremes (0x3FFF and 0x0000).
- System Messages. These span several categories:
- System Exclusive (SysEx). Manufacturer-specific messages used to send bulk parameter dumps, firmware updates or specialised control data (e.g., a Roland synthesiser’s patch editing).
- System Common. Timing clock, song position pointers used in synchronisation between sequencers and drum machines.
- Real-Time Messages. Timing Clock (24 pulses per quarter note), Start, Stop, Continue—used to synchronise sequencers, tape machines and DAWs.
Understanding these message types is crucial when delving deeper into MIDI editing or troubleshooting communication issues.
Physical Connections: MIDI DIN, USB‐MIDI and Beyond
Originally, MIDI devices interfaced via 5-pin DIN connectors. A hardware keyboard would have a MIDI OUT port (to send messages), IN (to receive messages) and sometimes a THRU port (to mirror incoming messages onward). A simple daisy-chain linked a keyboard to a sound module to a sequencer etc.
Since the late 1990s, USB-MIDI has become ubiquitous. USB-connected MIDI keyboards relabel traditional DIN inputs into a USB interface; a computer recognises the device immediately. While USB-MIDI can carry multiple virtual “ports” and higher data bandwidth, the underlying message structure remains precisely the same as the classic DIN standard. More recently, protocols like MIDI over Bluetooth and MIDI 2.0 (with bidirectional high-resolution messaging) have begun to surface, but MIDI 1.0 (DIN and USB) remains the industry mainstay.
Applications of MIDI
Composition and Sequencing
Perhaps the most iconic use of MIDI is in music composition: recording and editing performances via a DAW sequencer (Ableton Live, Logic Pro, Cubase, Reaper, etc.). Instead of committing notes irrevocably to audio, MIDI data allows for non-destructive editing:
- Record Performance. Strike notes on a keyboard; the DAW captures timestamps, note numbers and velocities.
- Quantise and Edit. Adjust timing (quantisation), pitch (transpose, note-by-note correction), dynamics (velocity editing), and length (note-length adjustments) with precision.
- Instrument Swapping. Assign the same MIDI track to different virtual instruments (e.g., swap a grand piano patch for a synth pad) with a few clicks, instantly altering timbre.
- Arrangement. Copy, paste, loop and reorganise MIDI clips to experiment with song structure.
This fluidity accelerates creativity—composers can try out myriad instrument combinations and arrangements without re-recording.
Live Performance and Control
MIDI isn’t restricted to studio environments. Performers harness it to control:
- Hardware Synthesizers and Samplers. A master keyboard sends MIDI data to rackmount modules on stage.
- Lighting and Effects Rigs. MIDI Show Control (MSC) messages can trigger lighting changes, smoke machines, video cues—ensuring tight synchronisation between music and visuals.
- Footpedals and MIDI Controllers. Guitarists or DJs use footswitches to send program changes, toggle loops or adjust effect parameters mid-performance.
- Laptop-Based Setups. Performers run Ableton Live or MainStage onstage, driving virtual instruments and backing tracks, all steered via MIDI controllers and mapped knobs/faders.
Moreover, MIDI Clock synchronises multiple devices so that arpeggiators, drum machines and sequencers stay locked in tempo. For instance, running a drum machine as the “master clock” and sending Clock messages to a synthesiser ensures their tempo-bound patterns align perfectly.
Educational and Sound Design
Institutions and educators leverage MIDI to teach music theory, piano technique and composition. Because MIDI reveals discrete note data, students can visualise:
- Note Durations. Observe how long each key is held, reinforcing rhythmic concepts.
- Velocity Distributions. Analyse dynamics—how hard a note is struck—enabling feedback on expressive playing.
- Intervallic Structures. Display real-time note values on screen, aiding ear-training and scale practice.
Sound designers also rely on MIDI when sculpting bespoke patches. Assigning multiple MIDI CCs to filter cutoffs, resonance, envelope parameters and LFO rates grants fine-grained control over complex synthesiser architectures, facilitating precise sonic tailoring.
MIDI in Film, TV and Gaming
MIDI’s role extends beyond instrumental performance. In scoring for film or television, composers often create detailed mockups using MIDI—presenting directors with realistic renditions of orchestral parts via high-quality sample libraries. These mockups can be edited effortlessly before the final orchestral session, saving time and budget.
Similarly, video game audio designers employ MIDI to trigger adaptive music systems. When a player’s in-game state changes—entering combat, exploring a serene environment—MIDI messages can cue different musical stems or modify parameters in real time, ensuring seamless transitions.
How to Use MIDI Effectively
Choosing the Right Hardware and Software
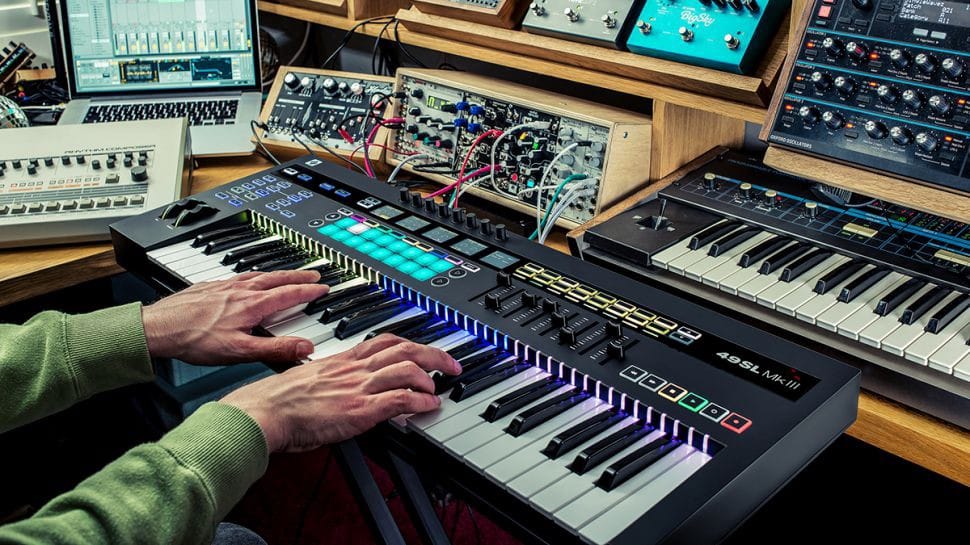
1. MIDI Controllers (Keyboards, Pads, Wind Controllers):
- Keybed Quality. If you play piano or synthesiser parts extensively, opt for at least semi-weighted keys with velocity sensitivity and aftertouch. Budget controllers may have non-weighted, synth-action keys, which suffice for many electronic music contexts but can feel limiting for pianistic expression.
- Pads and Knobs. Many modern controllers pack velocity-sensitive pads (ideal for finger-drumming) and assignable knobs or faders. Select a layout that suits your workflow. For instance, if you produce hip-hop beats, a pad-centric controller (e.g., Akai MPD series) might be ideal; if you engineer synth patches, controllers with lots of knobs (e.g., Novation Launch Control) facilitate real-time parameter tweaking.
2. Sound Modules and Synthesiser Engines:
If you intend to use external hardware for tone generation, a rackmount multi-timbral module (e.g., Roland XV-series, Yamaha Motif Rack) remains a stalwart choice. For software-based production, ensure your computer’s CPU and RAM can handle multiple virtual instruments simultaneously. Consider SSD storage when working with sample-heavy libraries.
3. DAW Selection:
Popular DAWs such as Logic Pro (macOS only), Cubase, Ableton Live, FL Studio, Studio One and Reaper all provide robust MIDI sequencing environments. Trial each to determine which interface, workflow and stock plugin suites resonate with your creative approach. Pay attention to latency performance, track count, editing tools and third-party plugin compatibility.
Setting Up a MIDI Workflow
- Initial Connections:
- Plug your MIDI controller into your computer via USB (or through a MIDI interface if using DIN cables).
- Open your DAW and verify that the device appears in the MIDI settings/preferences. Ensure that both “MIDI Input” and, if needed, “MIDI Output” are enabled.
- Creating a MIDI Track:
- In your DAW, create a new MIDI or Instrument track. Select your desired virtual instrument (e.g., a piano sampler, synthesiser plugin).
- Arm the track for recording and verify that key presses light up the DAW’s MIDI activity meter. This confirms successful communication.
- Latency and Buffer Size:
- Low latency is essential for responsive playing. In your DAW’s audio settings, choose a buffer size that balances latency and CPU load. For recording, aim for buffer sizes around 64–128 samples (≈3–6 ms latency); for mixing, you can raise the buffer to 256–512 samples to conserve CPU resources.
- Mapping Controllers and Automation:
- If your controller has assignable knobs/faders, assign them to plugin parameters (filter cutoff, reverb send, etc.) via the DAW’s MIDI Learn function.
- Record automation by moving controllers during playback; your DAW will capture CC data, allowing dynamic, expressive adjustments over time.
- Using Templates:
- Create DAW templates that pre-configure common setups: track colours, instrument assignments, channel routings, bus sends, common automation lanes, and so on. This expedites session setup and keeps you focused on creativity rather than technical details.
- Saving and Organising Patches:
- If using hardware modules, learn to send and store SysEx dumps of your custom patches—ensuring that you can recall exact sounds in future sessions.
- For software synthesizers, build and catalogue custom presets organised by genre, timbre or project type; develop a consistent naming convention to locate sounds quickly during production.
Best Practices and Common Pitfalls
- Avoiding “Overquantisation”:
While quantising can tighten timing, excessive use can render performances mechanical. Trust your musical ear: if a slightly laid-back groove feels more human, embrace minor imperfections. - Managing MIDI Clip Lengths and Loop Points:
Ensure that short, looped MIDI clips align precisely to bar divisions to avoid phasing issues when looping. For example, a drum loop should ideally end exactly on the downbeat of the next bar if you intend to loop it seamlessly. - Checking Velocity Curves:
Different controllers have varying velocity response curves (linear vs. exponential). In your DAW or instrument’s settings, calibrate the curve to match your playing style—ensuring that pianissimo and fortissimo dynamics are faithfully translated. - Monitoring CPU Load:
Running multiple resource-intensive soft synths with high voice counts can cause dropouts. Use freeze, bounce-in-place or render certain MIDI tracks to audio to reduce strain during mixdown, then re-import the audio if further editing is not required. - Naming and Routing:
Label MIDI tracks clearly (“Drum Rack: Kick”, “Piano: Verse”, “Bass: Chorus”) and organise bus sends early in the workflow (e.g., reverb bus, delay bus, parallel compression bus). This prevents confusion in large arrangements. - Understanding MIDI Channel Assignments:
If using multiple external modules, place each on its own MIDI channel, and confirm that the hardware’s channel settings match your DAW’s track routing. A common mistake is having multiple instruments inadvertently set to the same channel, resulting in unwanted cross-triggering. - Using MIDI Thru Wisely:
When daisy-chaining hardware devices (keyboard → module A → module B), resist the temptation to pass all channels downstream. Instead, use a dedicated MIDI interface with multiple ports or configure your DAW as the central hub (sending discrete channels to each device), reducing latency and potential message conflicts.
Advanced MIDI Topics
MIDI Polyphonic Expression (MPE)
Introduced as an extension to standard MIDI, MPE allows each note in a chord to convey independent pitch-bend, timbre and pressure data. Traditional MIDI’s single channel does not permit per-note micro-expressivity; MPE achieves this by allocating each note to its own MIDI channel (within a defined range) and using CCs (e.g., CC 74, 75) and pitch-bend per channel to impart expressive nuances.
- Applications of MPE. Instruments like the ROLI Seaboard, LinnStrument and Haken Continuum harness MPE to permit slide, glide, vibrato and pressure control on individual notes—enabling performers to shape sound in a deeply organic way. Many soft synths (Equator, Strobe2, Vital) offer MPE-compatible patches.
- DAW Support. Ensure your DAW and chosen virtual instruments are MPE‐aware. For instance, Logic Pro includes an “MPE Instrument” track type; Cubase Pro and Bitwig Studio also provide MPE routing options.
MIDI Time Code and Synchronisation
When integrating MIDI with external sequencers, tape machines or lighting rigs, MIDI Time Code (MTC) and MIDI Clock become indispensable:
- MIDI Clock. Sends 24 clock pulses per quarter note. Devices sync tempo based on the incoming clock; however, it doesn’t convey position within a song.
- MIDI Time Code (MTC). Based on SMPTE (Society of Motion Picture and Television Engineers) time code, MTC messages encode hours, minutes, seconds and frames—enabling precise location synchronisation. This is crucial for scoring to picture or coordinating audio playback with film/video timelines.
Set one device as master (transmitting Clock or MTC) and route its output to all slaves. In a DAW, designate the “Sync” preferences to send MIDI Clock or MTC on your chosen MIDI port. Always confirm frame rates (e.g., 24fps, 25fps, 30fps) match across devices to maintain lock integrity.
MIDI Over Network and Wireless
The advent of Ethernet MIDI (using protocols such as RTP-MIDI) and Bluetooth MIDI has allowed untethered connections between devices. For instance:
- Wireless iPad Integration. Apps like GarageBand, Cubasis or Lemur on iOS can send MIDI data to desktop DAWs on your network with minimal latency.
- Stage Flexibility. With Bluetooth MIDI controllers (e.g., CME WIDI Master, Yamaha MD-BT01), performers can roam a stage without worrying about stripping cables.
However, keep in mind that wireless connections may introduce jitter or occasional dropouts; for mission-critical live applications, wired MIDI is still the most reliable choice.
Putting It All Together: A Practical Tutorial
Let us outline a straightforward, step-by-step workflow for a beginner aiming to write a short piano/strings composition and achieve a final mix:
- Select Your Equipment and Software:
- MIDI Controller: A 49-key keyboard with velocity and aftertouch.
- DAW: Choose one (e.g., Ableton Live Lite bundled with your controller).
- Virtual Instruments: Install a high-quality piano library (e.g., Pianoteq, Keyscape) and a credible string ensemble patch.
- Initial Setup:
- Connect the keyboard via USB to your computer.
- Launch the DAW and configure MIDI settings so that the controller is recognised as both Input and Output (for patch feedback).
- Create a Template Session:
- Track 1: “Piano” (MIDI track with Pianoteq loaded); assign it to Channel 1.
- Track 2: “Strings” (MIDI track with string ensemble loaded); assign Channel 2.
- Bus A: “Reverb” (send bus with a high-quality ambience plugin).
- Bus B: “Compression” (parallel compression bus).
- Save this as “Piano+Strings Template” to expedite future sessions.
- Record the Piano Part:
- Arm Track 1 for recording.
- Play the main chord progression (e.g., C major → A minor → F major → G major).
- Use light quantisation (e.g., 1/16-note swing) to tighten timing but preserve human feel.
- Add Expression:
- After recording, open the piano MIDI clip and adjust velocities for more dynamic nuance (e.g., emphasise downbeats with slightly higher velocities).
- Draw subtle sustain pedal CC 64 curves to emulate natural pedalling.
- Record the Strings Part:
- Arm Track 2. Play or step-record an underlying string pad that follows the chord changes.
- Use CC1 (modulation wheel) to introduce a slow crescendo on the strings, simulating an orchestral swell.
- Mixing and Automation:
- Route both tracks to Bus A (Reverb) with 20–30% wet mix for spatial depth.
- Add subtle automation: at the bridge (e.g., bars 17–24), automate the string volume to rise gradually, then taper off.
- Apply light compression on the piano track (e.g., a ratio of 2:1, threshold set so that the loudest peaks are restrained by ~3 dB) to smooth dynamics.
- Export and Finalise:
- Bounce the master output to stereo audio (44.1 kHz, 24-bit WAV).
- Listen through various monitoring setups (studio monitors, headphones) to check tonal balance.
- If satisfied, render MP3 (320 kbps) for quick sharing or review.
This simple exercise illustrates how MIDI streamlines both creative ideation (experimenting with instrument choices and arrangements) and technical workflows (velocity editing, automation, mixing).
Troubleshooting Common MIDI Issues
Even seasoned professionals encounter MIDI hiccups. Here are some frequent problems and solutions:
- No Sound on Playback:
- Check MIDI Routing. Ensure the MIDI track’s Output port and channel correspond to the instrument’s input settings.
- Verify the Instrument is Not Muted or Bypassed. In your DAW, confirm the instrument plugin is active.
- Stuck Notes (Held-Over Notes):
- Typically caused by missing “Note Off” messages. Press the “All Notes Off” or “Panic” button (many MIDI controllers or DAWs include this function).
- Check if a sustain pedal’s CC 64 is stuck at a high value. Manually send a CC 64 = 0 to release all sustained notes.
- Latency and Timing Drift:
- High Buffer Size. Temporarily lower the buffer size when recording; increase it during mixing.
- MIDI Thru Delays. Daisy-chaining multiple devices via THRU can introduce tiny delays. Whenever possible, route all hardware devices through a dedicated multi-port MIDI interface rather than chaining THRU ports.
- Incorrect Controller Mappings:
- If your faders or knobs control unexpected parameters, clear existing MIDI mappings in your DAW and reassign controls using “MIDI Learn.”
- Consult your controller’s manual to verify CC numbers and functions; different models sometimes assign CCs differently.
- Ghosting or Double-Triggering:
- Some cheaper controllers suffer from “ghost notes” (unintended notes triggered by simultaneous keypresses). If persistent, consider adjusting the controller’s key sensitivity settings (if available) or upgrading to a higher-quality unit.
Future Trends and Developments
While MIDI 1.0 remains the ubiquitous standard, the advent of MIDI 2.0 promises to usher in a new era of higher resolution, bidirectional communication and auto-configuration of devices. Key enhancements in MIDI 2.0 include:
- Higher Resolution Messages. 32-bit values for note velocity, control changes and pitch allow for vastly more nuanced expression.
- Profiles and Property Exchange. Automatic device discovery will permit a controller and a soft synth to configure optimal mappings without manual “MIDI Learn” procedures.
- Better Timing and Jitter Reduction. Tighter synchronisation for live performance and studio contexts, reducing latency and jitter relative to legacy MIDI 1.0 DIN protocols.
Manufacturers and software developers are gradually adopting MIDI 2.0 features, but MIDI 1.0 remains dominant due to broad legacy support. Over the coming years, we can anticipate hybrid devices that support both standards, bridging traditional workflows with next-generation expressive possibilities.
Conclusion
MIDI has indelibly shaped the landscape of digital music creation over the last four decades. By encapsulating musical gestures as data rather than audio, MIDI grants musicians unprecedented flexibility: recording first, auditioning sounds later; shifting instrumentation with a few clicks; fine-tuning performances in the editing suite; and synchronising complex hardware and software ecosystems. From bedroom producers sculpting beats on pad controllers to film composers devising sprawling orchestral mockups, MIDI remains the lingua franca of digital music.